This post provides some tips of growing and caring for Salvia nemorosa. Salvias belong to the mint family and are native to Europe and west-central Asia. There are many species of salvia, some are annual, and others are perennial. Salvia nemorosa is the most popular perennial in the family, commonly known as woodland sage or meadow sage. These perennials are hardy to zone 4, and prefer moist, well-drained soil at a sunny location. They are 1.5 – 3 ft tall and 1.5 -2 ft wide. Blooming time ranges from June to September. Most of them have violet-blue flowers, but a few have pink flowers.
Saliva nemorosa are magnet for butterflies and bees. Recommended cultivars are: Caradonna, May Night, and Pink Friesland. They are available from jungseed.com.
Salvia nemorosa: Pink FrieslandSalvia nemorosa: CaradonnaSalvia nemorosa: May Night
Caring for Salvia nemorosa
Salvia nemorosa is easy to grow. They are truly drought-tolerant and deer resistant plants. Maintenance is minimal. Just shear off the spent flower spikes to extend the blooming period. In the fall, the plants tend to flop and bend outward. When that happens, cut the old stems back to allow the new basal growth to receive the sunlight.
They can grow for years without intervention. However, if the clump becomes too large, divide them in early spring shortly after new leaves appear. Division of salvia is similar to that of daylilies as described in this post. The clump may be loose, so do not worry if they break into pieces during division. Just plant a few pieces in one hole. Their roots may be woody, and require cutting with a sharp knife.
This post provides some tips for growing and caring for yarrows. Yarrow is a truly deer and rabbit resistant, and drought tolerant perennial for the sunny part of the garden. It grows well in poor soil, and is hardy to zone 3. As a result, it emerge from dormancy early in spring. It has feathery foliage and produces flat-topped clusters of white, yellow, pink or red florets from early summer to early fall. Depending on variety, yarrow has a height of 1-3 ft. The tall one may need support, especially when it is blooming. However, you can cut off the top half of the plant to produce a bushier plant.
Yarrow is available as potted plants from local nurseries or online stores such as brecks.com. However, you can easily raise this plant from seeds. The seeds are available from parkseed.com. Companion plants for yarrow are daylily and salvia.
Caring for Yarrows
Yarrow needs little care. It does not need too much fertilizer. Dead-heading encourages blooming to continue till late fall. When the older stems begin to wither, jut cut them off at the base to allow younger ones to appear with more flowers. This plant has short life. However, you can rejuvenate it by dividing it every 2 years. The best time to divide yarrow is early spring when new growth just begins. To divide, dig up the whole clump, and cut the clump into two parts with the spade. Replant them with a space of 1-2 feet. On the other hand, it readily self-seeds. You can transplant the young plants to other locations.
This post provides some tips for growing and caring for astilbes. Astilbes are the perfect perennial for a shady area of your garden. Deer and rabbit never touch them. They are hardy to zone 4. In summer, they produce large plumes of white, peach, lavender or red flowers that brighten up the shady area for weeks. Their green foliage remains attractive till late fall. They come in different sizes, short (1.5 – 2 ft), tall (2 – 3 ft) and giant (up to 4 ft). Taller varieties withstand longer period of sunlight.
Tall astilbes
The giant variety, Mighty Pip and Mighty Chocolate Cherry, are available from jungseed.com as bare-root plants. They are perfect for the back of a perennial border along a fence. They add colors to brighten the shady spot. Astilbes are also truly deer resistant. A good companion plant for astilbes is bleeding hearts.
Short Astilbes
The short astilbes are best suited for border of this east facing flower bed, where they receive only morning sun. Behind the astilbes is a row of azaleas that just finished blooming.
Growing and Caring for Astilbes
Astilbe bare root
Astilbes can be purchased online from a number of companies such as jungseed.com and longfield-gardens.com. They are available in different colors and heights. They are often shipped as bare roots as shown in the picture shown above. To plant them, just dig a hole in the ground, put the bare root in the hole with the top of the root about 1 inch below the soil surface, and fill the hole with soil amended with compost. If upgrowth has already started, do not compress the soil or you will damage the upgrowth. Just add soil loosely on top. Water the new transplant weekly, and apply fertilizer when leaves appear.
Astilbes are easy-care. However, they are not drought tolerant, and they need watering at least once a week if there is no rain. Otherwise, their leaves will dry up and become crispy. The plants may even die. Maintenance is minimal. In early autumn, just cut the dried flower stalks down to 2 inches above ground. Dead-heading will not produce another bloom. When all leaves have fallen in autumn, remove the leaf stalks also.
Astilbes can grow for a few years without intervention. However, when they are getting too crowded, divide them by lifting up the clump and splitting it with garden forks. The best time to divide astilbes is early spring when the leaves just appear. Older plants may have woody roots. You need to cut them apart by knife or saw. Alternatively, you can cut half of the clump with a root cutting shovel, and lift it up, leaving the other half in ground. You can find the information of root cutting shovel in this post. Then replant the smaller clumps in another location with a spacing of 2 feet.
This post provides some tips for growing and caring for coneflowers. Coneflower is so named because of the spiny center cone of its flowers. Its genus name, Echinacea, is derived from the Greek word echinos, meaning sea-urchin. It is a native plant in eastern and central North America. It is deer resistant and drought tolerant, and has a hardiness to zone 3.
Growing Coneflowers from Seeds
Besides the common purple and white cultivars, coneflowers are now available in a variety of colors including green one. Some even have double flowers that look like a pompon, such as Hot Papaya shown above. Most of the less common cultivars are available as plants only, and are expensive. However, Cheyenne Spirit and PowWow Series coneflowers are available as seeds from jungseed.com. PowWow Series give you either white or purplish-rose flowers. But Cheyenne Spirit gives you flowers of a range of colors from yellow to red.
In order to start germination, these seeds require a chilling period (as winter months outdoor). If you start the seeds indoor, you can fool them by placing them between sheets of slightly moistened paper towels inside a Ziploc bag and storing the bag in the Crisper Drawer of a refrigerator for a couple of months. After the chilling period, you can plant the seeds in potting soil for germination indoor in April. In June, you can set out the seedlings in the garden. They may bloom in the second year.
Caring for Coneflowers
Maintenance for coneflowers is minimal, just remove spent flowers to encourage reblooming and discourage self-seeding. In autumn, cut the stems that turn brown down to 6 inches above soil level. After a few years, divide the large clumps in early spring by lifting up the whole plant, followed by inserting two garden forks back to back into the center of the clump and pulling them apart. Then replant the divisions with a spacing of 18 inches.
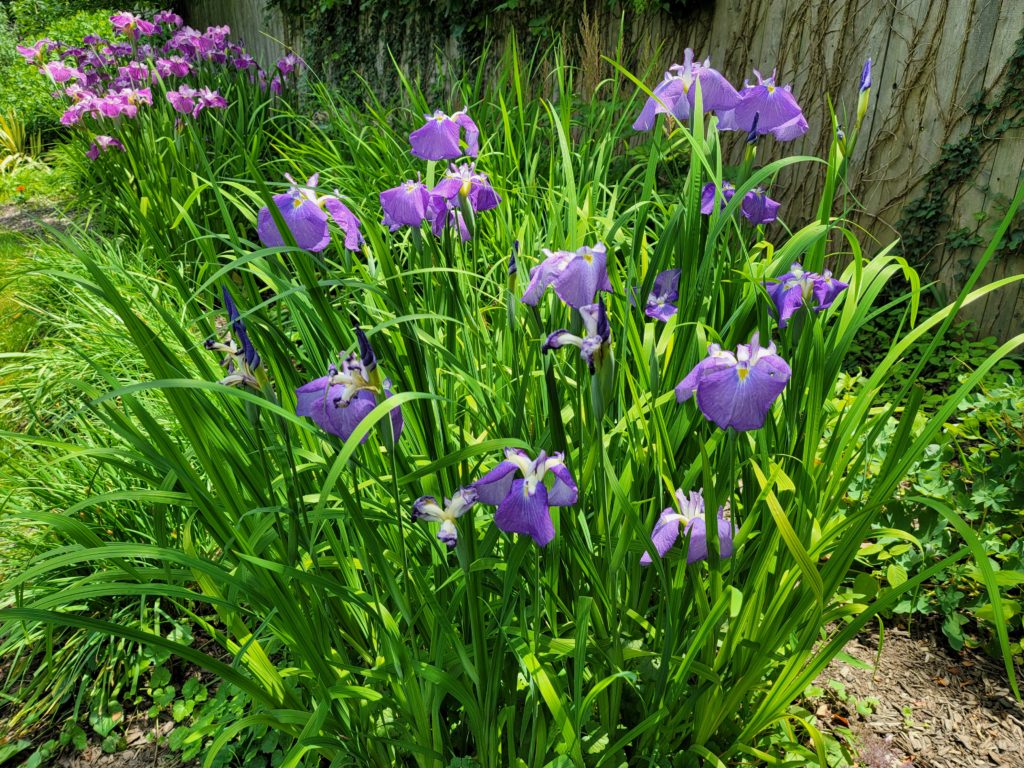
This post provides some tips for growing and caring for irises. Iris takes its name from the Greek word for a rainbow, probably because of a wide range of colors of flowers produced by it’s family members. The common irises suitable for Northeastern region are bearded iris, Siberian iris, and Japanese iris. All have hardiness to zone 3. They like full sun, however, Siberian and Japanese irises can stand part shade. All of them are deer resistant.
Growing irises
Bearded Iris
Bearded iris is so named because of groups of fuzzy hairs growing from the downward-facing petals. There are dwarf and tall cultivars. They have broad sword-like leaves. Their flowers are huge and in multiple colors. Bearded irises are drought tolerant. In fact, they do not like wet soil. Therefore, you should plant them in an area with good drainage. Their rhizomes look like ginger. The top of the rhizomes like to bathe in the sun. So you can plant them with the rhizome at the soil level. Bearded irises bloom in June, you should fertilize them in early spring.
Siberian IrisJapanese Iris
Siberian and Japanese irises are beardless. They have narrower leaves and form clumps, and bloom later than the bearded irises. Both irises produce flowers in multiple colors. The flowers of Japanese iris are huge, but those of Siberian iris are smaller. Siberian iris is not fussy on soil types. However, you should plant them in area with good drainage. They may rot in winter when the soil is too wet. On the other hand, Japanese iris prefers moist soil. Therefore, they need more frequent watering. Moreover, they will do better if they are in partly shady area, so that they will not be dried out too fast.
A huge selection of irises is available from many online stores, such as brecks.com.
Caring for Irises
Bearded iris
Because weeds can grow among bearded iris plants, there will be lot more work to do before and after blooming. The easiest way to remove weeds is pulling them out after rain. To facilitate weeding, make sure you can access the groups of irises from all directions. After blooming, you can cut the flower stalks at the base to prevent formation of seed pods.
Every 3-4 years, you can divide them by lifting them up with garden fork as soon as they finish blooming. Then cut off the old rhizomes with a sharp knife as shown in the pictures below, and re-plant the young ones (with their leaves cut down to about 3 inches to reduce loss of water) with spacing of 12 inches. Sprinkling the rhizomes with fungicide powder before planting may prevent rotting. In the fall, remove all dried leaves around the irises to prevent growth of molds and rotting of the rhizomes.
Freshly dug irisTrimmed irisDividing iris
Siberian and Japanese irises
Maintenance for Siberian and Japanese irises is minimal. You just need to cut off the flower stalks down to the base after blooming. However, you may wait some time for Japanese iris, because new flower buds may appear after the other flowers are gone. In the fall, cut off the leaves of both irises down to 6 inches to prevent them from prostrating side way. If the plant becomes crowded, lift it up with a garden fork in early fall. The clump may fall apart naturally into several small plants. For a large, entangled clump, it can be divided by inserting two garden forks back to back in the middle of the clump and pull apart in opposite direction. Replant each separated plant in another locations.